

How to Download and Install Python (Complete Guide)
In this complete guide on how to download and install Python, we’ve explained everything step-by-step in a simple, easy-to-understand way. We’re confident that after reading this, any beginner student will be able to set up Python on their computer without any mistakes!
In the previous post, we covered what Python is along with its features and applications. If you haven’t read that yet, you can check it out here:
How to Download Python?
- Step 1: Open any web browser (like Google Chrome or Microsoft Edge) on your computer or laptop and go to www.python.org.
- Step 2: As soon as the website opens, you’ll see a Downloads menu at the top — click on it.
- Step 3: Now select your operating system — Windows, Linux/Unix, macOS, or Android.
- Step 4: For example, if you’re using Windows on your computer, click directly on the Windows option.
- Step 5: From here, download the correct installer for your system, such as Windows Installer (64-bit) or Windows Installer (32-bit).
- Step 6: As soon as you click, the Python setup file will start downloading to your computer and will be ready for installation within a few seconds.
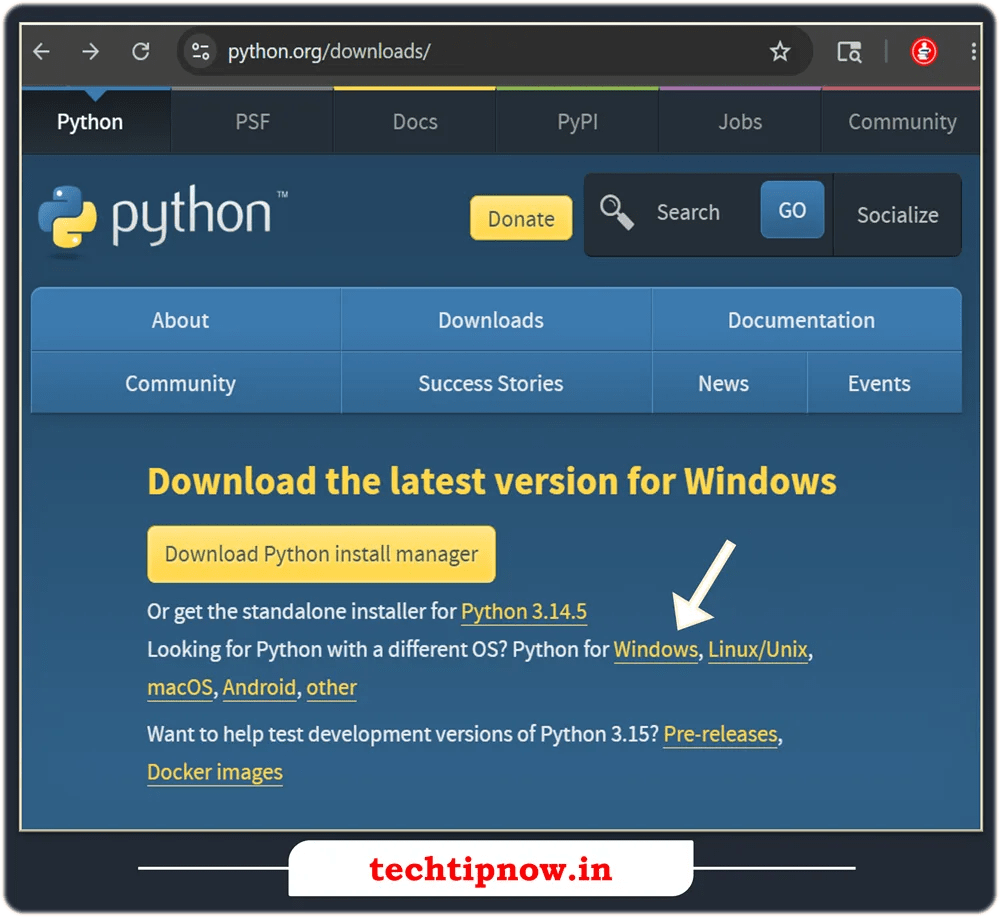
Note: While downloading Python, you can choose any version based on your needs, such as Python 3.14.5, Python 3.14.4, or Python 3.13.13. However, our recommendation is to always download the latest stable version available on the website so you get all the newest features and updates.
How to Install Python?
After downloading, the next step is setting it up on your computer. Follow the steps below:
- Step 1: Double-click the Python installer file you downloaded (for example: Python 3.14.5 (64-bit)).
- Step 2: As soon as the installation window opens, make sure to select the “Add Python.exe to PATH” checkbox at the bottom.

💡 Important tip: Checking “Add python.exe to PATH” is very important so that your computer can easily find and run Python.
- Step 3: Now click the Install Now button shown at the top of the window.
- Step 4: If a User Account Control (UAC) pop-up message appears on your screen, click Yes to grant permission to Windows.
- Step 5: Just wait a few seconds until the installation process completes.
- Step 6: Once the process is complete, Python and IDLE will both be successfully installed on your computer and ready to use!
How to Start Python IDLE?
After installing Python, we now need to open IDLE to start coding. Follow these simple steps:
- Step 1: Click the Start Menu (Windows button) at the bottom-left of your screen.
- Step 2: Type “IDLE” directly using your keyboard to search.
- Step 3: You’ll see the IDLE (Python 3.x) option in the search results — click on it.
- Step 4: As soon as you click, the IDLE window will open in front of you, where you can write your first Python code!
